EUROCOMPULSION® V4 INTAKE SYSTEM INSTRUCTIONS
-First and foremost just a quick THANK YOU for purchasing our intake system. This install
procedure is fairly easy but if you do run into an difficulties please do not hesitate to contact us.
Tools Needed:
1-1/4 Ratchet with small extension
1-8mm socket
1-screwdriver
1-pair of pliers
Time Needed:
20min
*(Make sure car is cool)
Skill Level:
Level 1-5: Skill level 1
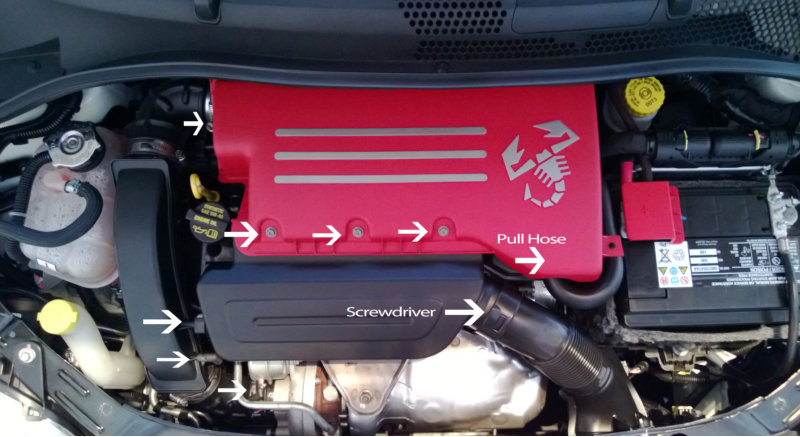
REMOVAL PROCEDURE
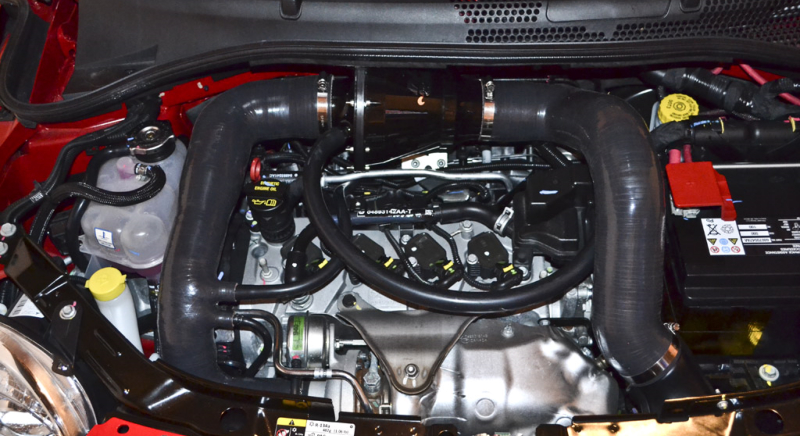
STEP 1- Remove the 8mm screws on the Air filter box / UN-clip hose from Red cover
STEP 2 – Remove Red cover and DISCARD OEM FILTER & OEM ENGINE COVER
STEP 3 - Loosen Clamps from air-box cover and from turbo inlet
STEP 4 - Using pair of pliers remove small vacuum line and remove large vacuum line (pinch tab)
STEP 5 – Using an 8mm socket remove the front air scoop
STEP 6 - Remove the accordion style portion of the front air scoop (8mm bolt) (you can either snap
off the tab or use a dremel tool and remove the bottom tab, see image 9 and image 10)
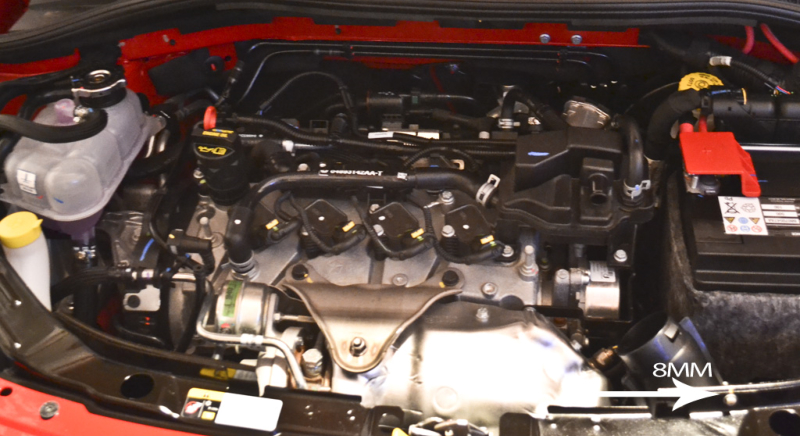
INSTALL PROCEDURE
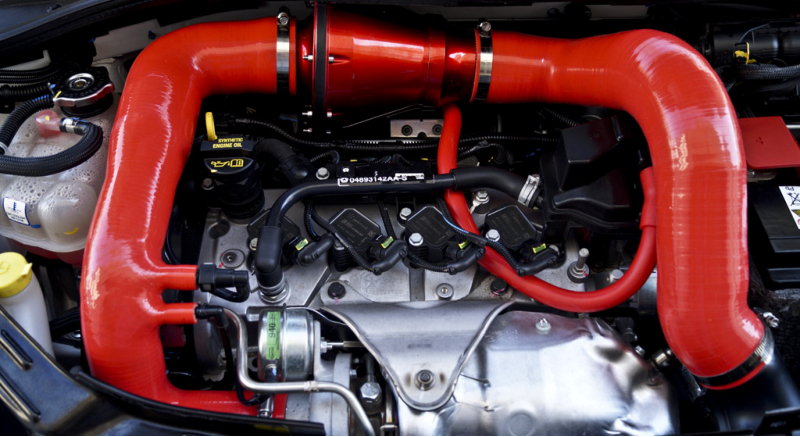
STEP 1- Install Both sides of the Silicone Intake (Install with clamps but leave loose)
STEP 2 – Re-connect Vacuum lines
STEP 3 – Install Apollo Filter between both Silicone hoses(push filter under cowl)
STEP 4- Connect PCV hose to PCV Valve and connect it to adapter on Apollo Filter
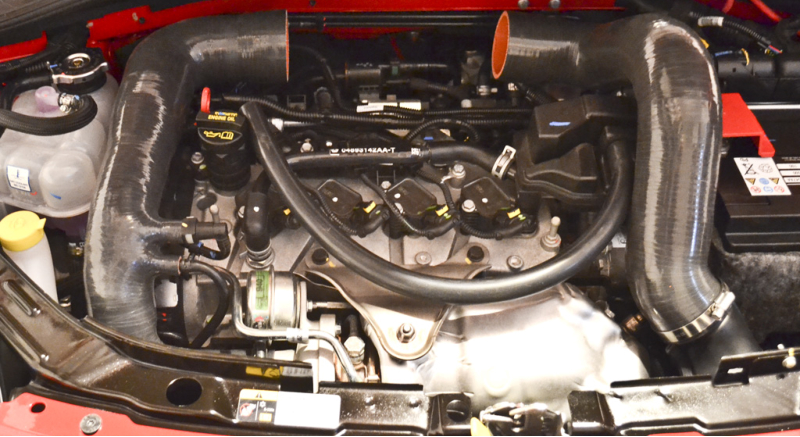
NOTE*** (You can turn filter Around and install PCV line close to firewall to conceal line, see image 6)
STEP 5 – Tighten clamps on filter
STEP 6- Position Filter and Hoses (make sure silicone hoses are aligned properly and not touching hood)
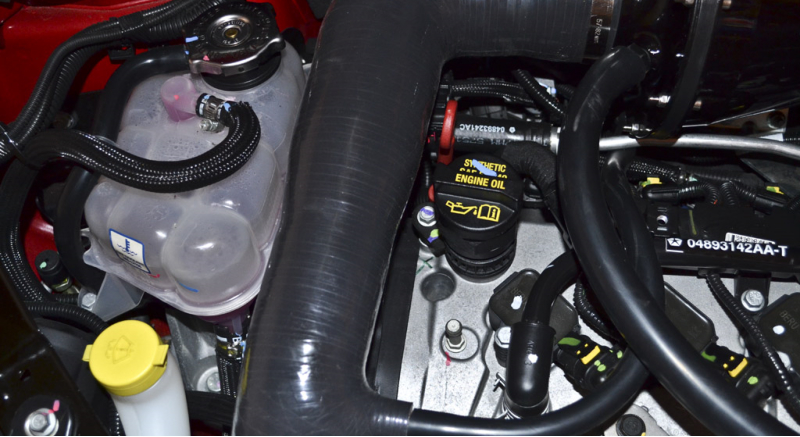
STEP 7 – Please see alignment image to right------> Position Silicone from turbo inlet to correct distance
from dipstick also Install filter enclosure lip to left side of EVAP line.
Congratulations Your All Finished! Thank you for your purchase. If you have any comments or concerns
please do not hesitate to contact us.
***Special Install Notes***
-Alignment with this intake is critically important, as we are using every possible amount of space to
install this system to bring the smoothest bends and the widest diameter filter and Silicone tubing.
-The Apollo filter if installed correctly will slightly tilt down and the last clamp that should be tightened
is the clamp on the right side of the filter.
-If you have a forge BOP you will need to lube the silicone on the outside to slid it past the Forge BOP,
and you will have a1/16th gap between the silicone and turbo inlet which is OK and normal.(Thanks Gigante)
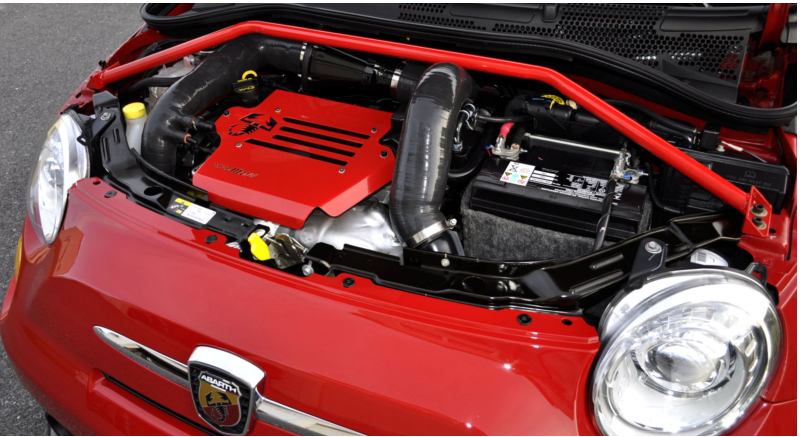
-If you are running an engine cover you will need to install the PCV line as shown in image #6, around the
the coilpacks and a smooth gentle bend to the Apollo filter.
-You can also utilize the RRM upper chassis brace with this intake, what you need to do is some add some
washers under the bar to simply prop it up a few MM and this will allow enough clearance. (See image #7)
(Thanks Again Gigante!!)
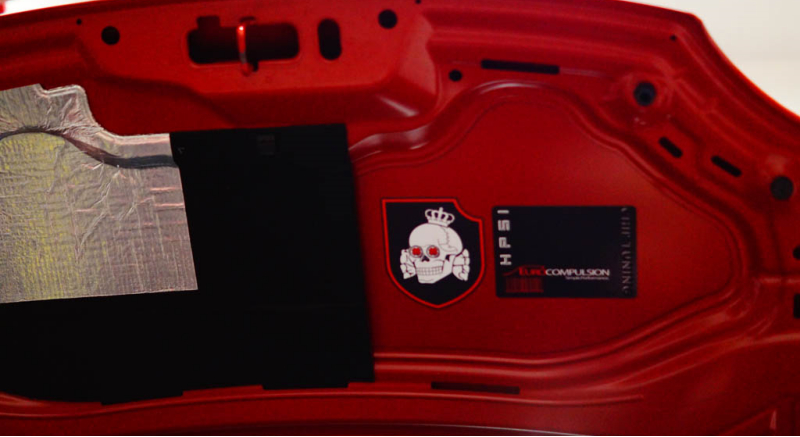
-What myself and some other users have decided to do is to trim the engine insulation under the hood.
(see image #8)
1.
2.
3.
4.
5.
6.
PROPER ALIGNMENT!
7.
WITH UPPER BRACE BAR
8.
HOOD INSULATION TRIMMED


EUROCOMPULSION® LLC/EURO+DRIVE® 2015. All Rights Reserved. Not affiliated with FIAT/DODGE. All Products Are RACE/OFF-ROAD Use ONLY. JOLLY CLUB LOGO used with permission.

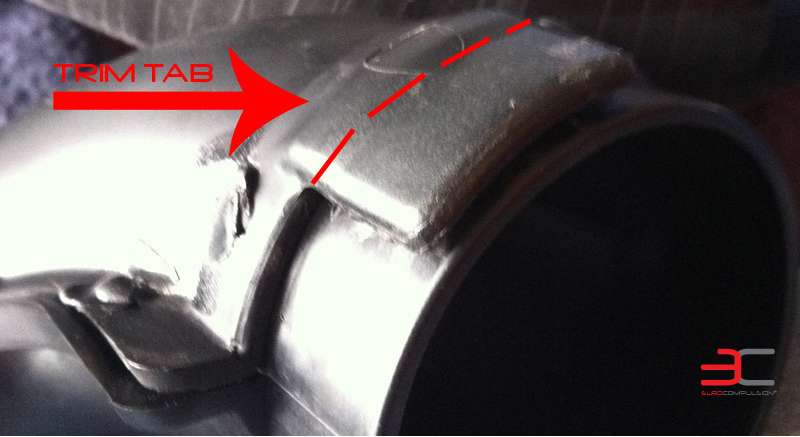
TRIM TAB ON RAM-AIR INLET
9.
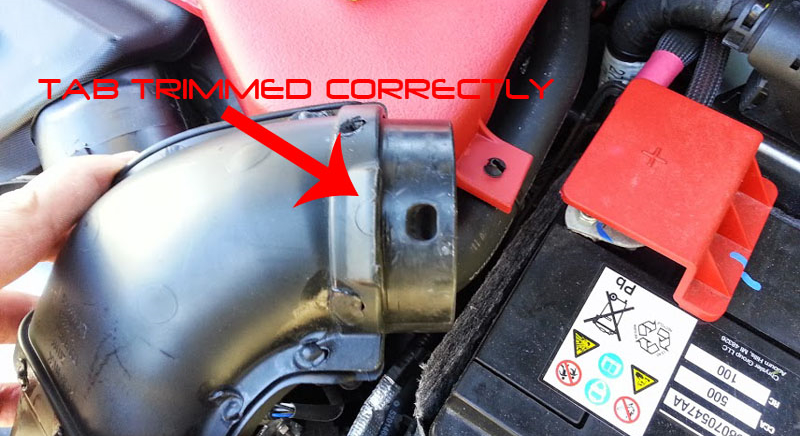
TAB TRIMMED PROPERLY
10.


Alfa romeo 4c
ROADRACE MOTORSPORTS
modern performance
abarthonly.com abarthonly abarthonly
500madness.com
alfa 4c tuning
alfa 4c intake
modern performance
https://www.ngencustomsandperformance.com/
ROADRACE MOTORSPORTS

alfa 4c forum